If you’ve ever woken up to a dead phone because your charger wasn’t quite connected, you know the frustration. A 3-in-1 charging station can simplify your life—but only when it’s set up correctly. The good news? Getting it right takes just a few minutes and a bit of know-how. Let’s walk through each step so your devices charge reliably every single night.
Key Takeaways
- Place the charging station on a flat surface within 3–6 feet of a grounded outlet with adequate airflow clearance.
- Connect the included 40W USB-C adapter and cable fully to ensure fast-charging speeds for all devices.
- Align your iPhone over the MagSafe puck until magnets snap it into place, removing thick or metal cases first.
- Center your Apple Watch on its magnetic puck until you feel a click and see the charging indicator appear.
- Place your AirPods case flat on the Qi pad with the lid closed and hinge facing away for proper charging.
Choosing the Ideal Location for Your Charging Station
Before you plug in your new 3-in-1 charging station, you’ll want to scout out the right spot for it.
Place the unit on a flat, stable surface within 3–6 feet of a grounded wall outlet. This distance prevents strain on the 40W USB-C cable and assures your Apple devices receive full power during charging.
Keep the station away from heat sources, direct sunlight, and humid areas like bathrooms. These conditions can damage internal components and weaken the MagSafe alignment magnets over time.
Leave 4–6 inches of clearance behind and above the charger for proper airflow.
Also, avoid placing it near metal objects or tangled cables, which can cause wireless interference and slow down charging speeds.
Unboxing and Identifying All Included Components
Upon opening your charging station’s box, you’ll want to lay out every item on a clean surface to confirm nothing’s missing.
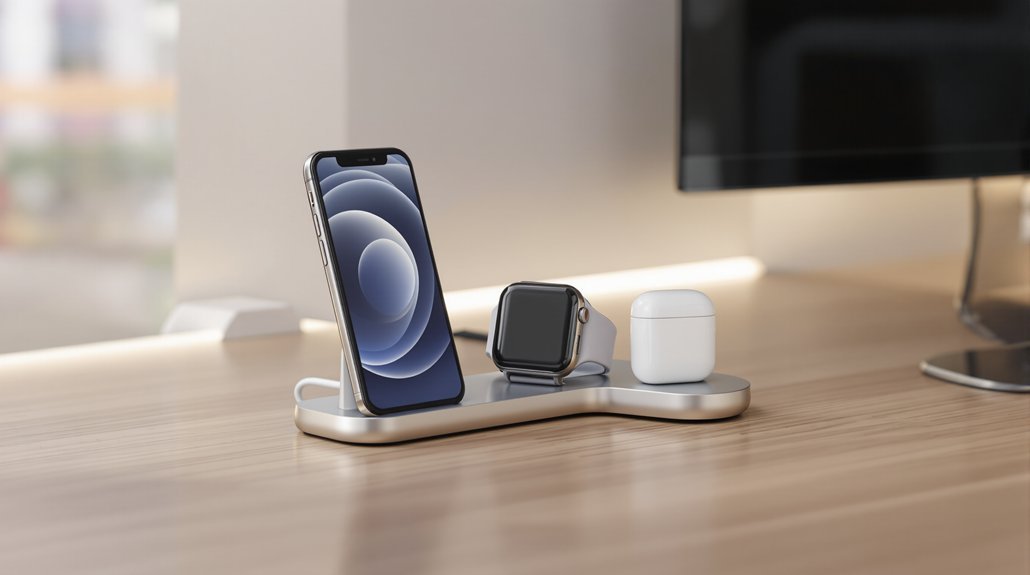
You should find the 3-in-1 charger unit, a 40W USB-C power adapter, the USB-C to USB-C charging cable, international plug adapters, and a premium travel pouch.
Take a moment to inspect the charger’s labeled zones:
- The MagSafe Qi2 pad for your iPhone
- The dedicated puck for Apple Watch Ultra or other Apple Watch models
- The Qi pad sized for AirPods
- LED indicator locations for status feedback
This travel charger includes a quick start guide with safety warnings and device placement diagrams.
Store that guide alongside the warranty card in your travel pouch—you’ll appreciate having everything organized when you’re on the road.
Connecting the Power Adapter and USB-C Cable
Grab the 40W USB-C power adapter from your box and confirm it’s the one that shipped with your charger—using a lower-wattage adapter will slow down your fast-charging speeds markedly.
Take your USB-C cable and plug it into the charger’s input port, pushing until the connector seats completely. Make sure the cable isn’t twisted or kinked.
Connect the cable’s other end to your 40W USB-C power adapter. If your adapter came with international plug heads, snap on the correct one for your region before proceeding.
Now insert the adapter firmly into a grounded wall outlet—skip the surge protector for initial setup.
Watch for the LED indicators to light up. If all LEDs flash continuously, check the troubleshooting section. A normal light pattern means you’re ready to charge.
Positioning Your Iphone on the Magsafe Charging Pad
Pick up your iPhone and hold it over the MagSafe charging puck—you’ll feel the built-in magnets pull the phone into perfect alignment. This snap into place means your Apple device is positioned for optimal wireless charging at up to 15W speeds.
Before you set your phone down, keep these essentials in mind:
- Remove metal cases or anything thicker than 3mm—they block the magnetic connection.
- Use a MagSafe-compatible case for reliable charging every time.
- Place your iPhone flat or upright based on your charger’s design, ensuring nothing hangs off the edge.
- Watch for the charging animation on your lock screen within seconds.
If the LED glows and your battery icon appears, you’re all set. That satisfying magnetic click means charging has begun.
Setting Up the Apple Watch Charging Module
Now it’s time to turn your attention to the Apple Watch charging module on your 3-in-1 station.
First, confirm the watch puck connects securely to the charging station’s internal components and that the USB-C cable plugs firmly into your 40W adapter or an Apple Store-certified 5V/1A–2A power source.
Place your watch with the case back centered on the magnetic puck—you’ll feel it click into position.
Within seconds, look for a green lightning bolt on the display.
A red bolt means critically low battery, so give it extra time.
Remove any metal bands, thick cases, or magnetic accessories blocking the connection.
If charging still fails, test with a different cable or outlet to determine whether the puck or power source needs replacing.
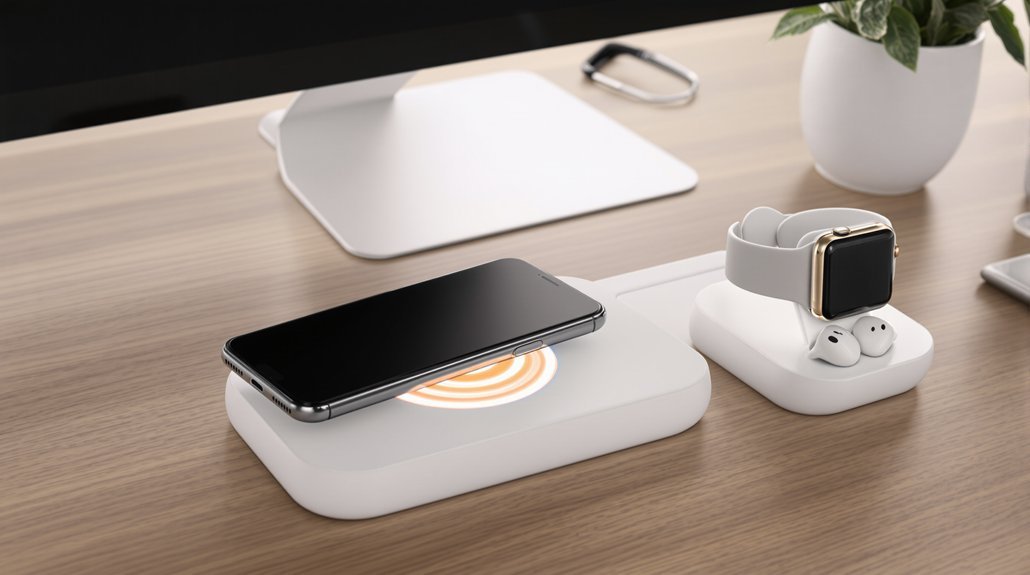
Placing Your AirPods for Optimal Charging Contact
With your Apple Watch now charging, it’s time to position your AirPods case on the designated earbuds coil area. Center the case with the hinge facing away from the charger’s edge—this aligns the internal receiver coil properly. Make sure the lid is fully closed and the case sits flat against the pad.
For reliable charging across all your devices:
- Remove any metal objects, credit cards, or thick protective cases that could block the magnetic field
- Feel for the magnetic snap if your case supports MagSafe
- Watch the LED indicator for steady confirmation within 5–10 seconds
- Reposition slightly if the light blinks or no charge registers
Your power adapter should support the 5–15 W range for peak efficiency with Qi2 or MagSafe-compatible cases.
Troubleshooting Common Charging Issues and Solutions

Although most charging issues resolve quickly, you’ll want to start by confirming the basics before diving into more complex fixes.
First, test wired charging with your phone’s original cable and a reliable 5V/3A wall adapter. If wired charging fails, wireless won’t work either.
For MagSafe or Qi2 charging, make sure your case is thinner than 3 mm with no metal plates or credit cards blocking the coils. Proper alignment matters—center your phone on the magnetic ring.
If all four LED indicators flash, unplug the charger for 30 seconds, then reconnect to a dedicated wall outlet. Try using another certified cable and device to isolate the problem.
When issues persist after these steps, contact Zagg/mophie directly for warranty replacement rather than your retailer.
Frequently Asked Questions
How to Use a 3 in 1 Charging Station?
Place your iPhone on the MagSafe pad, your Apple Watch on its stand, and your earbuds on the Qi coil—proper device placement guarantees magnetic alignment for fast charging.
Connect the included USB-C cable to the 40 W adapter and plug it into a working outlet. Good cable management keeps your space tidy and prevents accidental disconnections.
Check each device’s battery icon to confirm it’s charging.
How to Setup a Charging Station?
Place your 3-in-1 charger on a flat, ventilated surface and plug it into a surge protection power strip—this guards against voltage spikes that can damage your devices.
Connect the included 40W adapter using the USB-C cable.
For cable management, route cords behind your desk or use clips to prevent tangling.
Align your MagSafe phone, Apple Watch, and AirPods on their designated spots, then confirm each charging indicator lights up.
How to Use 3 in 1 Power Fold 15W Magclick Wireless Charging Pads?
Place the Power Fold 15W Magclick pad on a flat surface and connect it to the included 40W adapter for full fast-charging.
Center your iPhone on the magnetic alignment spot—you’ll feel it snap into place.
Check case compatibility first; thick or non-magnetic cases can block the connection.
Set AirPods on the earbud zone and your Apple Watch on its dedicated coil.
Steady LED lights mean you’re charging properly.
How to Set up EV Charging Station at Home?
To set up an EV charging station at home, start by confirming your electrical panel can handle a dedicated 240V, 40-amp circuit.
Hire a licensed electrician to install the circuit and make certain code compliance.
Check for utility incentives—many providers offer rebates that reduce costs markedly.
Consider your home energy usage and whether a hardwired or plug-in setup works best.
Position the charger within 25 feet of your parking spot.
Bottom Line
You’ve now got everything in place to keep your devices charged and ready. By choosing a stable spot, connecting your cables securely, and aligning each device on its designated pad, you’ll enjoy reliable wireless charging every day. If something isn’t working, check your case thickness and cable connections first. With this setup, you’ll spend less time hunting for chargers and more time using your devices.