The Ninja Foodi offers a variety of quick and delicious recipes perfect for busy weeknight dinners. Some top selections include Chicken Alfredo Pasta, a creamy and versatile dish that can be prepared in under 30 minutes, and Beef Stroganoff, featuring tender beef and rich mushrooms. For something lighter, try Vegetable Stir-Fry, incorporating colorful produce and protein options. Additionally, BBQ Pulled Pork and Crispy Air Fryer Tacos provide flavorful family meals. Don’t forget dessert, like Chocolate Lava Cake, for a sweet finish. These options not only simplify meal prep but also guarantee your family’s satisfaction with every bite. Explore further for more enticing ideas.
Chicken Alfredo Pasta
Chicken Alfredo Pasta is a quintessential weeknight dinner that combines rich flavors with minimal effort, making it a favorite among busy families. This dish is characterized by its creamy sauce and tender chicken, and it can be prepared in under 30 minutes. It’s perfect for those hectic evenings when time is of the essence.

Dive into delicious with our savory STOUFFER’S CLASSICS Chicken Fettuccini Alfredo Made with ingredients you can feel good about for a homemade taste you'll love Grilled...
Why You Should Make It
- Quick and Easy: Ready in less than half an hour.
- Versatile: Add veggies like broccoli or mushrooms.
- Family Favorite: Appeals to both kids and adults.
Ingredients
- 8 oz fettuccine or pasta of choice
- 2 boneless, skinless chicken breasts, cut into strips
- 2 tbsp olive oil
- 2 cloves garlic, minced
- 1 cup heavy cream
- 1 cup grated Parmesan cheese
- Salt and pepper to taste
- Fresh parsley for garnish
Instructions
- Cook the Pasta: Bring a large pot of salted water to a boil. Cook pasta according to package instructions until al dente. Drain and set aside.
- Sauté the Chicken: In the Ninja Foodi, select the Sauté function. Heat olive oil and add chicken strips. Season with salt and pepper. Cook until golden brown and cooked through, about 5-7 minutes. Remove chicken and set aside.
- Prepare the Sauce: In the same pot, add minced garlic and sauté for 1 minute until fragrant. Pour in heavy cream and bring to a gentle simmer.
- Add Cheese: Stir in grated Parmesan cheese until the sauce is smooth and creamy.
- Combine Everything: Return the cooked chicken and pasta to the pot. Toss to coat everything evenly with the sauce.
- Serve: Garnish with fresh parsley and extra Parmesan cheese if desired.
Tip: For extra flavor, add a pinch of red pepper flakes or a squeeze of lemon juice.
2. Beef Stroganoff
Beef Stroganoff is a classic dish that effortlessly combines tender strips of beef with a creamy mushroom sauce, making it a popular choice for weeknight dinners. Prepared quickly in the Ninja Foodi, you can enjoy this comforting and satisfying meal without spending hours in the kitchen.
Why You Should Make It
- Hearty and Filling: Perfect for cold evenings.
- One-Pot Meal: Easy cleanup with the Ninja Foodi.
- Customizable: Substitute beef with chicken or tofu.
Ingredients
- 1 lb beef sirloin, cut into thin strips
- 2 tbsp olive oil
- 1 medium onion, chopped
- 8 oz mushrooms, sliced
- 2 cloves garlic, minced
- 2 cups beef broth (low sodium)
- 1 cup sour cream
- 2 tbsp all-purpose flour
- 1 tsp Dijon mustard
- Salt and pepper to taste
- 8 oz egg noodles
- Fresh parsley for garnish
Instructions
- Sauté Beef: Select the Sauté function on the Ninja Foodi. Heat olive oil and add beef strips. Season with salt and pepper. Cook until browned. Remove and set aside.
- Cook Vegetables: In the same pot, add onions and mushrooms. Sauté until softened. Add garlic and cook for another minute.
- Add Flour: Sprinkle flour over the vegetables and stir well to combine.
- Add Broth and Mustard: Pour in beef broth and stir in Dijon mustard. Bring to a simmer.
- Pressure Cook: Return beef to the pot. Secure the lid and select the Pressure Cook function on high for 10 minutes.
- Cook Noodles: While the beef cooks, prepare egg noodles according to package instructions.
- Finish Sauce: After pressure cooking, release the pressure carefully. Stir in sour cream until the sauce is creamy.
- Serve: Spoon the beef stroganoff over egg noodles and garnish with fresh parsley.
Tip: For extra richness, add a splash of white wine when sautéing the onions and mushrooms.
3. Crispy Air Fryer Tacos
Crispy Air Fryer Tacos are a delightful twist on a traditional favorite, offering a satisfying crunch without the excess oil of deep-frying. Utilizing the Ninja Foodi’s air fryer function, these tacos achieve a golden, crispy exterior while retaining the juicy filling inside.
Why You Should Make It
- Healthier Option: Less oil means fewer calories.
- Fun and Interactive: Great for family dinners or parties.
- Versatile Fillings: Use beef, chicken, or vegetarian options.
Ingredients
- 12 corn or flour tortillas
- 1 lb ground beef or protein of choice
- 1 packet taco seasoning
- 1 cup shredded cheddar cheese
- 1/2 cup diced onions (optional)
- Cooking spray
- Toppings: diced tomatoes, lettuce, sour cream, salsa
Instructions
- Prepare Filling: Select Sauté function. Cook ground beef until browned. Add taco seasoning and follow package instructions. Stir in diced onions if using.
- Assemble Tacos: Place a spoonful of meat mixture and some cheese onto one half of each tortilla. Fold tortillas in half to create a taco shape.
- Air Fry Tacos: Lightly spray both sides of the tacos with cooking spray. Place them in the air fryer basket in a single layer (cook in batches if necessary). Select Air Crisp function at 390°F and cook for 5-7 minutes per side until crispy.
- Add Toppings: Carefully remove tacos and add desired toppings.
- Serve: Enjoy immediately while they’re hot and crispy.
Tip: For an extra kick, add sliced jalapeños inside the tacos before air frying.
4. Vegetable Stir-Fry
A vibrant Vegetable Stir-Fry is an excellent way to incorporate a variety of fresh produce into your weeknight dinners. This quick and colorful dish not only tantalizes the taste buds but also packs a nutritional punch, making it a fantastic choice for health-conscious families.
Why You Should Make It
- Healthy and Nutritious: Packed with vitamins and minerals.
- Quick Preparation: Ready in under 20 minutes.
- Customizable: Use any vegetables you have on hand.
Ingredients
- 2 tbsp sesame oil or vegetable oil
- 2 cloves garlic, minced
- 1 tsp fresh ginger, grated
- 4 cups mixed vegetables (bell peppers, broccoli, carrots, snap peas)
- 2 tbsp soy sauce
- 1 tbsp teriyaki sauce (optional)
- 1 tsp sesame seeds
- Salt and pepper to taste
- Optional: tofu, chicken, or shrimp for added protein
- Cooked rice or noodles for serving
Instructions
- Prepare Ingredients: Chop all vegetables into bite-sized pieces.
- Sauté Aromatics: Select Sauté function. Heat oil in the Ninja Foodi. Add minced garlic and grated ginger; sauté for 1 minute.
- Cook Vegetables: Add mixed vegetables to the pot. Stir-fry for 5-7 minutes until tender-crisp.
- Add Sauces: Stir in soy sauce and teriyaki sauce if using. Cook for another 2 minutes.
- Season: Sprinkle with sesame seeds, salt, and pepper to taste.
- Serve: Serve over cooked rice or noodles.
Tip: For extra flavor, add a splash of rice vinegar or a drizzle of honey.
5. BBQ Pulled Pork
Succulent and tender, BBQ Pulled Pork is a crowd-pleasing dish that brings a smoky, savory flavor to your weeknight dinners. Utilizing the Ninja Foodi’s pressure cooking capabilities, you can create this delectable meal in a fraction of the time it typically takes.
Why You Should Make It
- Time-Saving: Pressure cooking reduces hours of cooking to about an hour.
- Versatile Serving Options: Serve on buns, over rice, or with sides.
- Leftovers: Tastes even better the next day.
Ingredients
- 3 lbs pork shoulder (pork butt), cut into large chunks
- 2 tbsp olive oil
- 1 large onion, sliced
- 3 cloves garlic, minced
- 1 cup BBQ sauce, plus more for serving
- 1 cup chicken broth
- 2 tbsp brown sugar
- 1 tbsp paprika
- 1 tsp chili powder
- Salt and pepper to taste
- Buns for serving (optional)
Instructions
- Season Pork: In a bowl, mix brown sugar, paprika, chili powder, salt, and pepper. Rub the spice mixture all over the pork pieces.
- Sear the Pork: Select Sauté function. Heat olive oil and sear pork on all sides until browned. Remove and set aside.
- Cook Onions and Garlic: In the same pot, sauté onions until translucent. Add garlic and cook for 1 minute.
- Add Liquids: Pour in chicken broth and BBQ sauce. Stir well.
- Pressure Cook: Return pork to the pot. Secure the lid and select Pressure Cook on high for 60 minutes.
- Release Pressure: Allow natural release for 10 minutes, then carefully quick release remaining pressure.
- Shred Pork: Remove pork and shred using two forks. Return to the pot and mix with the sauce.
- Serve: Serve on buns with extra BBQ sauce or alongside your favorite sides.
Tip: For an added smoky flavor, use a smoked paprika or add a drop of liquid smoke to the sauce.
6. Creamy Tomato Soup
For those evenings when comfort food is a must, Creamy Tomato Soup stands out as a simple yet satisfying option. This classic dish not only warms the soul but also delivers a rich, velvety texture that is hard to resist.
Why You Should Make It
- Comforting: Perfect for chilly nights.
- Simple Ingredients: Uses pantry staples.
- Quick Prep: Ready in about 30 minutes.
Ingredients
- 2 tbsp olive oil
- 1 medium onion, chopped
- 2 cloves garlic, minced
- 2 cans (28 oz each) crushed tomatoes
- 2 cups vegetable or chicken broth
- 1/2 cup heavy cream
- 1 tsp sugar (optional, to balance acidity)
- Salt and pepper to taste
- Fresh basil for garnish
- Optional: grilled cheese sandwiches for serving
Instructions
- Sauté Aromatics: Select Sauté function. Heat olive oil and add onions. Cook until softened. Add garlic and cook for 1 minute.
- Add Tomatoes and Broth: Pour in crushed tomatoes and broth. Stir well.
- Pressure Cook: Secure the lid and select Pressure Cook on high for 10 minutes.
- Blend the Soup: After cooking, carefully release pressure. Use an immersion blender to puree the soup until smooth.
- Add Cream: Stir in heavy cream. If desired, add sugar to balance the acidity.
- Season: Add salt and pepper to taste.
- Serve: Garnish with fresh basil and serve hot.
Tip: For a dairy-free version, substitute heavy cream with coconut milk or almond milk.
7. Garlic Butter Shrimp
Garlic Butter Shrimp is a quick and flavorful dish that transforms fresh shrimp into a gourmet experience in no time. This delightful recipe combines succulent shrimp with rich, aromatic garlic and creamy butter.
Why You Should Make It
- Fast Cooking: Ready in under 15 minutes.
- Elegant: Perfect for special occasions or date nights.
- Low Carb: Great for keto or low-carb diets.
Ingredients
- 1 lb large shrimp, peeled and deveined
- 4 tbsp unsalted butter
- 4 cloves garlic, minced
- 1/4 tsp red pepper flakes (optional)
- 2 tbsp fresh lemon juice
- 2 tbsp fresh parsley, chopped
- Salt and pepper to taste
- Optional: cooked pasta or crusty bread for serving
Instructions
- Season Shrimp: Pat shrimp dry and season with salt and pepper.
- Sauté Garlic: Select Sauté function. Melt butter in the Ninja Foodi. Add minced garlic and red pepper flakes; cook for 1 minute.
- Cook Shrimp: Add shrimp to the pot. Cook for 2-3 minutes on each side until pink and opaque.
- Add Lemon and Parsley: Stir in lemon juice and fresh parsley.
- Serve: Serve immediately over pasta or with crusty bread.
Tip: Don’t overcook the shrimp; they become tough if cooked too long.
8. Teriyaki Chicken
Teriyaki Chicken brings a taste of Japan to your dinner table with minimal effort. This savory and slightly sweet meal is perfect for busy weeknights, as it can be prepared quickly using the Ninja Foodi.
Why You Should Make It
- Flavorful: Bursting with umami flavors.
- Quick: Ready in about 20 minutes.
- Family-Friendly: Kids love the sweet and savory sauce.
Ingredients
- 1.5 lbs boneless, skinless chicken thighs, cut into bite-sized pieces
- 2 tbsp vegetable oil
- 1/3 cup soy sauce
- 1/3 cup mirin (Japanese sweet rice wine)
- 1/4 cup brown sugar
- 2 cloves garlic, minced
- 1 tsp fresh ginger, grated
- 1 tbsp cornstarch mixed with 2 tbsp water (slurry)
- Sesame seeds and green onions for garnish
- Cooked rice for serving
Instructions
- Sauté Chicken: Select Sauté function. Heat oil and add chicken pieces. Cook until browned.
- Prepare Sauce: In a bowl, mix soy sauce, mirin, brown sugar, garlic, and ginger.
- Add Sauce to Chicken: Pour the sauce over the chicken. Stir to coat.
- Pressure Cook: Secure the lid and select Pressure Cook on high for 5 minutes.
- Thicken Sauce: After cooking, release pressure carefully. Select Sauté function and stir in cornstarch slurry. Cook until sauce thickens.
- Serve: Serve over cooked rice and garnish with sesame seeds and green onions.
Tip: For extra veggies, add steamed broccoli or snap peas to the dish.
9. Stuffed Bell Peppers
Stuffed Bell Peppers offer a colorful and nutritious option for busy weeknight dinners. Using the Ninja Foodi, you can achieve perfectly cooked peppers with tender fillings in a fraction of the time.
Why You Should Make It
- Nutritious: Packed with protein and veggies.
- Customizable: Use your favorite fillings.
- One-Pot Meal: Easy cleanup.
Ingredients
- 4 large bell peppers, tops removed and seeded
- 1 lb ground turkey or beef
- 1 cup cooked rice or quinoa
- 1 small onion, chopped
- 2 cloves garlic, minced
- 1 can (14 oz) diced tomatoes
- 1 cup shredded cheese (cheddar or mozzarella)
- 1 tsp Italian seasoning
- Salt and pepper to taste
- 1 cup water (for pressure cooking)
Instructions
- Prepare Filling: Select Sauté function. Cook ground meat until browned. Add onion and garlic; cook until softened. Stir in diced tomatoes, cooked rice, Italian seasoning, salt, and pepper.
- Stuff Peppers: Fill each bell pepper with the meat and rice mixture. Top with shredded cheese.
- Pressure Cook: Pour water into the Ninja Foodi pot. Place stuffed peppers on the reversible rack inside the pot. Secure the lid and select Pressure Cook on high for 10 minutes.
- Air Crisp (Optional): After pressure cooking, if you want the cheese browned, select Air Crisp at 400°F for 5 minutes.
- Serve: Carefully remove peppers and serve hot.
Tip: Use different colored bell peppers for a vibrant presentation.
10. Lemon Herb Salmon
Lemon Herb Salmon is a delightful and nutritious dish that can transform a simple weeknight dinner into a gourmet experience. The Ninja Foodi is perfect for preparing this dish quickly, allowing you to enjoy a restaurant-quality meal without the fuss.
Why You Should Make It
- Healthy: Rich in omega-3 fatty acids.
- Quick Cooking: Ready in under 15 minutes.
- Flavorful: Fresh herbs and lemon make it zesty.
Ingredients
- 4 salmon fillets
- 2 tbsp olive oil
- 2 cloves garlic, minced
- Juice and zest of 1 lemon
- 1 tbsp fresh dill, chopped
- 1 tbsp fresh parsley, chopped
- Salt and pepper to taste
- Lemon slices for garnish
Instructions
- Prepare Marinade: In a bowl, mix olive oil, garlic, lemon juice and zest, dill, parsley, salt, and pepper.
- Marinate Salmon: Place salmon fillets in the marinade for at least 15 minutes.
- Air Fry Salmon: Place salmon in the air fryer basket skin-side down. Select Air Crisp at 390°F and cook for 8-10 minutes until cooked through.
- Serve: Garnish with lemon slices and serve with your favorite sides.
Tip: Do not overcrowd the basket to ensure even cooking.
11. Cheesy Broccoli Casserole
After enjoying vibrant flavors, it’s time to explore Cheesy Broccoli Casserole. This comforting dish combines tender broccoli florets with a rich and creamy cheese sauce, creating a satisfying meal that appeals to both children and adults alike.
Why You Should Make It
- Comfort Food: Warm and satisfying.
- Vegetarian Option: Great as a main or side dish.
- Kid-Friendly: Encourages kids to eat veggies.
Ingredients
- 4 cups fresh broccoli florets
- 2 tbsp butter
- 2 tbsp all-purpose flour
- 1 cup milk
- 1.5 cups shredded cheddar cheese, divided
- 1/4 tsp garlic powder
- Salt and pepper to taste
- 1/2 cup breadcrumbs (optional)
- Cooking spray
Instructions
- Steam Broccoli: Place broccoli in the Ninja Foodi basket. Add 1 cup of water to the pot. Select Steam function and steam for 3 minutes. Remove and set aside.
- Prepare Cheese Sauce: Select Sauté function. Melt butter and stir in flour to make a roux. Gradually whisk in milk until smooth. Cook until thickened. Stir in garlic powder, salt, pepper, and 1 cup of cheddar cheese until melted.
- Combine: Mix steamed broccoli with the cheese sauce.
- Bake Casserole: Transfer mixture to a baking dish that fits in the Ninja Foodi or use the pot if oven-safe. Top with remaining cheese and breadcrumbs if using. Lightly spray with cooking spray.
- Air Crisp: Select Air Crisp at 375°F and cook for 8-10 minutes until the top is golden and bubbly.
- Serve: Let cool slightly before serving.
Tip: Add cooked chicken or ham for extra protein.
12. Sweet and Sour Meatballs
Bursting with flavor, Sweet and Sour Meatballs are a delightful addition to any weeknight dinner menu. This dish combines tender meatballs with a tangy, vibrant sauce that captivates the palate.
Why You Should Make It
- Crowd-Pleaser: Great for kids and adults.
- Make Ahead: Meatballs can be prepped in advance.
- Versatile: Serve over rice or noodles.
Ingredients
- For the Meatballs:
- 1 lb ground beef or pork
- 1/2 cup breadcrumbs
- 1 egg
- 2 cloves garlic, minced
- 1 tsp onion powder
- Salt and pepper to taste
- For the Sauce:
- 1 cup pineapple chunks with juice
- 1/2 cup brown sugar
- 1/3 cup vinegar (apple cider or white)
- 1/3 cup ketchup
- 2 tbsp soy sauce
- 1 tbsp cornstarch mixed with 2 tbsp water (slurry)
Instructions
- Prepare Meatballs: In a bowl, combine all meatball ingredients. Mix well and form into small meatballs.
- Sauté Meatballs: Select Sauté function. Brown meatballs on all sides. Remove and set aside.
- Prepare Sauce: In the pot, combine pineapple chunks with juice, brown sugar, vinegar, ketchup, and soy sauce.
- Pressure Cook: Return meatballs to the pot with the sauce. Secure the lid and select Pressure Cook on high for 5 minutes.
- Thicken Sauce: After cooking, release pressure carefully. Select Sauté function and stir in cornstarch slurry. Cook until sauce thickens.
- Serve: Serve over rice or noodles.
Tip: Add bell peppers and onions for extra flavor and color.
13. Baked Ziti
Baked Ziti is a classic Italian-American dish that offers a comforting blend of pasta, cheese, and rich tomato sauce. Perfect for busy weeknight dinners, this dish typically features ziti pasta combined with marinara, ricotta, mozzarella, and sometimes ground meat.
Why You Should Make It
- Family Favorite: Loved by all ages.
- Make Ahead: Prepare and refrigerate until ready to cook.
- One-Pot Dish: Less cleanup using the Ninja Foodi.
Ingredients
- 12 oz ziti or penne pasta
- 1 lb Italian sausage or ground beef (optional)
- 1 jar (24 oz) marinara sauce
- 1 cup water
- 1 cup ricotta cheese
- 2 cups shredded mozzarella cheese, divided
- 1/4 cup grated Parmesan cheese
- 1 tsp Italian seasoning
- Salt and pepper to taste
Instructions
- Cook Meat (Optional): Select Sauté function. Cook sausage or beef until browned. Drain excess fat.
- Add Pasta and Sauce: Add dry pasta, marinara sauce, water, and Italian seasoning to the pot. Stir well to combine.
- Pressure Cook: Secure the lid and select Pressure Cook on high for 5 minutes.
- Quick Release: After cooking, perform a quick release of pressure.
- Add Cheeses: Stir in ricotta cheese and half of the mozzarella.
- Top and Bake: Sprinkle remaining mozzarella and Parmesan on top. Select Bake/Roast function at 375°F and cook for 5-10 minutes until cheese is melted and bubbly.
- Serve: Let stand for a few minutes before serving.
Tip: Garnish with fresh basil for extra flavor.
14. Chicken and Rice
Chicken and Rice is a quintessential comfort food that combines tender chicken with flavorful rice, creating a satisfying and wholesome meal for busy weeknights.
Why You Should Make It
- One-Pot Meal: Easy preparation and cleanup.
- Comforting: Ideal for cozy evenings.
- Customizable: Add vegetables or different spices.
Ingredients
- 4 boneless, skinless chicken thighs or breasts
- 2 tbsp olive oil
- 1 medium onion, chopped
- 2 cloves garlic, minced
- 1 cup long-grain rice
- 2 cups chicken broth
- 1 tsp dried thyme
- Salt and pepper to taste
- Fresh parsley for garnish
Instructions
- Sauté Chicken: Select Sauté function. Heat olive oil and brown chicken on both sides. Remove and set aside.
- Cook Aromatics: In the same pot, sauté onion until softened. Add garlic and cook for 1 minute.
- Add Rice and Broth: Stir in rice, chicken broth, dried thyme, salt, and pepper.
- Add Chicken Back: Place chicken on top of the rice mixture.
- Pressure Cook: Secure the lid and select Pressure Cook on high for 12 minutes.
- Release Pressure: Allow natural release for 5 minutes, then quick release remaining pressure.
- Serve: Fluff rice with a fork, garnish with fresh parsley, and serve hot.
Tip: For extra flavor, add a splash of white wine when sautéing the onions.
15. Chocolate Lava Cake
Ending the evening with a decadent dessert like Chocolate Lava Cake is a perfect way to elevate the dining experience. This delightful dessert features a rich, molten chocolate center encased in a soft, cake-like exterior.
Why You Should Make It
- Indulgent Treat: Satisfies chocolate cravings.
- Quick Dessert: Ready in about 20 minutes.
- Impressive: Great for guests or special occasions.
Ingredients
- 4 oz semi-sweet chocolate chips or chopped chocolate
- 1/2 cup unsalted butter
- 1 cup powdered sugar
- 2 whole eggs
- 2 egg yolks
- 6 tbsp all-purpose flour
- Cooking spray
- Optional: vanilla ice cream or whipped cream for serving
Instructions
- Prepare Ramekins: Spray four ramekins with cooking spray and dust with cocoa powder.
- Melt Chocolate and Butter: In a microwave-safe bowl, melt chocolate and butter in 30-second intervals until smooth.
- Mix Ingredients: Stir in powdered sugar until well combined. Add eggs and egg yolks, mixing thoroughly. Fold in flour until just combined.
- Fill Ramekins: Divide batter evenly among prepared ramekins.
- Cook in Ninja Foodi: Place the ramekins on the reversible rack. Add 1 cup of water to the pot. Secure the lid and select Pressure Cook on high for 9 minutes.
- Release Pressure: Quick release the pressure carefully.
- Serve: Invert each ramekin onto a plate. Serve warm with ice cream or whipped cream.
Tip: Do not overcook to ensure the center remains molten.
Bottom Line
To conclude, the Ninja Foodi offers a versatile and efficient approach to preparing weeknight dinners, providing a variety of recipes that cater to diverse tastes and preferences. From the creamy richness of Chicken Alfredo Pasta to the savory satisfaction of BBQ Pulled Pork, each dish exemplifies the ease and convenience of this kitchen appliance. By integrating these recipes into your regular meal planning, you can enjoy delicious, home-cooked meals while minimizing preparation time and maximizing flavor. Explore these recipes to transform your weeknight dinners into delightful culinary experiences.

One 52.2 oz bag of Birds Eye Asian Style Stir Fry Vegetables
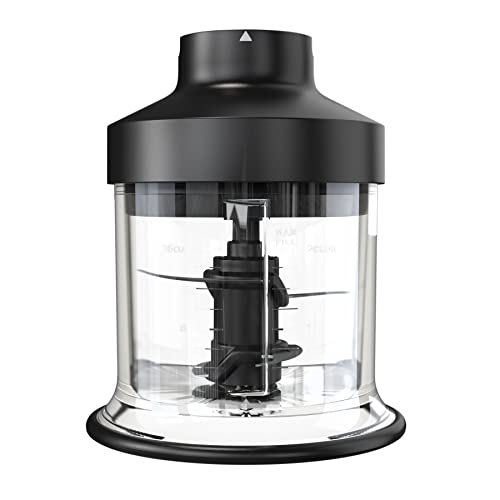
FOOD PROCESSING ATTACHMENT: For use with the Ninja Foodi Power Mixer System (works with CI100, CI101, CC105A, CI105BRN & CI101H).

Flavor & Texture - Since all the vegetables are only boiled in water as they are freshly picked, they retain their fresh texture and unique aroma. Simply dress them with sesame oil and salt to make a side dish.